Did you know that the tote bags frenzy dates to the 1940s? It wasn’t until the 20th century that these bags started getting noticed for their simplistic design and convenience. At this time, they started getting popular under the name “totes.”
Over the years, the bag endured a lot of style changes. People have tried various DIY tips and techniques to create personalized versions of totes. From keychains and badges to patches and patterns – these everyday bags have withstood it all.
Each of these crafts contributes to adding a unique and personalized touch to your totes. Still, the tote bag with pockets pattern is one interesting craft that’s quickly made its way to the top of the list of favorites for both teens and adults.
Tote Bags – the Holy Grail of Every Crafter

If you happen to be a fan of trying different DIY projects, then you’d know that these bags are the holy grail of every crafter. These bags are stylish, versatile, and easy to carry. Tote bags give crafters a lot of room to practice different DIY crafts on them.
One such trending craft that has quickly gained popularity is the textured and patterned pockets. Are you an aspiring crafter looking to learn how to make tote bags with pocket patterns? Below is a step-by-step guide to help you get started!
Tools of trade
- ¼ yard fabric (preferably cotton) for making the straps
- 2/3-yard fabric (preferably cotton) for making the pockets
- 1-yard lining fabric (works best if you use cotton)
- A pair of shears or scissors to cut the fabric
- A sewing machine
- 6-inch sewing gauge
- Thread (ideally, the color should match the fabric)
- 2 firm batting (10 ¼ x 14 ¼ inch rectangles)
- Tape measure
- Quilter’s pins
- An ironing board and an iron
- A pencil or fabric marking chalk
Step-by-step Instructions to Make Your Own Tote Bag With Pockets Pattern
Once you’ve collected all the things required to make your own tote bag with pocket patterns, you must follow the instructions below in the same order.
If you’re not familiar with using a sewing machine, try stitching a few lines on a spare piece of fabric. This will help you get acquainted with using the machine. Thankfully, there are a lot of great tutorials on YouTube to help you get your feet wet.
Step 1: Cutting the fabric
One of the first things you’ll need to do before making your own tote bag with a pocket is to choose your outer fabric. It’s best to stick with cotton fabric, but you can always play around with the print and colors.
The list of possibilities is endless. You can design the whole thing in a single print or create a patchwork tote. If you’re comfortable with the process, you might try mixing, matching, and coordinating your fabrics on different parts of your bag.
After choosing the fabric:
- Wash it with warm water and allow it to dry completely.
- Spread the fabric on a flat surface and mark the measurements mentioned below. You may use marking chalk and a tape measure for it.
- Pick up the shears and cut the fabric as explained below:
- Two pieces of the fabric in 4 x 34 ½ inch strips (to make the straps)
- Two pieces of the fabric in 14 ½ x 16 ½ inch rectangles (for the pockets)
- Two pieces of the fabric in 14 ½ x 20 ½ inch rectangles (for the lining)
Tip: Use the iron to flatten out the fabric and remove all the creases before measuring and cutting. This helps get an accurate measure.
Step 2: Stitching the straps
- Take the strap fabric one at a time. Fold it halfway in a lengthwise direction with the wrong side in. Now open the folded fabric and fold again, but only the long edges into the center. Finally, press.
- Next, refold the strap fabric in half and press firmly.
- Use the sewing machine to top-stitch the strap fabric. While doing so, make sure you stitch about a quarter inch from the corners.
- Finish sewing the fabric strap and repeat the same process with the other handle of the tote.
Step 3: Assembling the pockets and the lining
- Now take the pocket fabrics one at a time and fold them in half lengthwise. Keep the inner side facing up and make it into an 8¼ x 14 ½ inch pocket rectangle. Press firmly!
- Repeat the same process with the other rectangle to prepare the second pocket fabric.
- Bringing the right sides together, layer the lining and prepared pocket fabric together.
- Now place the batting rectangle under the layered pocket and lining pieces and pin them all together using the quilter’s pins.
- Once you’re done, pin the ends of the stitched straps as well to the bottom edge. Remember to leave 4 inches between each of the strap edges.
- Now start stitching. Begin with a top stitch across one side of the strap and then top stitch back to the bottom edge.
- Continue the same course of stitching on one side and then do the same on the other.
Step 4: Layering the pieces and putting the bag together
- The next step in making a tote bag with a pocket pattern includes layering the semi-finished bag pieces together with sewing pins.
- While doing so, make sure that you also pin the tote strap’s loose parts in its place. This will protect the straps from being caught in while stitching.
- Now join both pieces by stitching the edges. Remember to leave a 3-to-5-inch opening. This will help in turning the bag inside out.
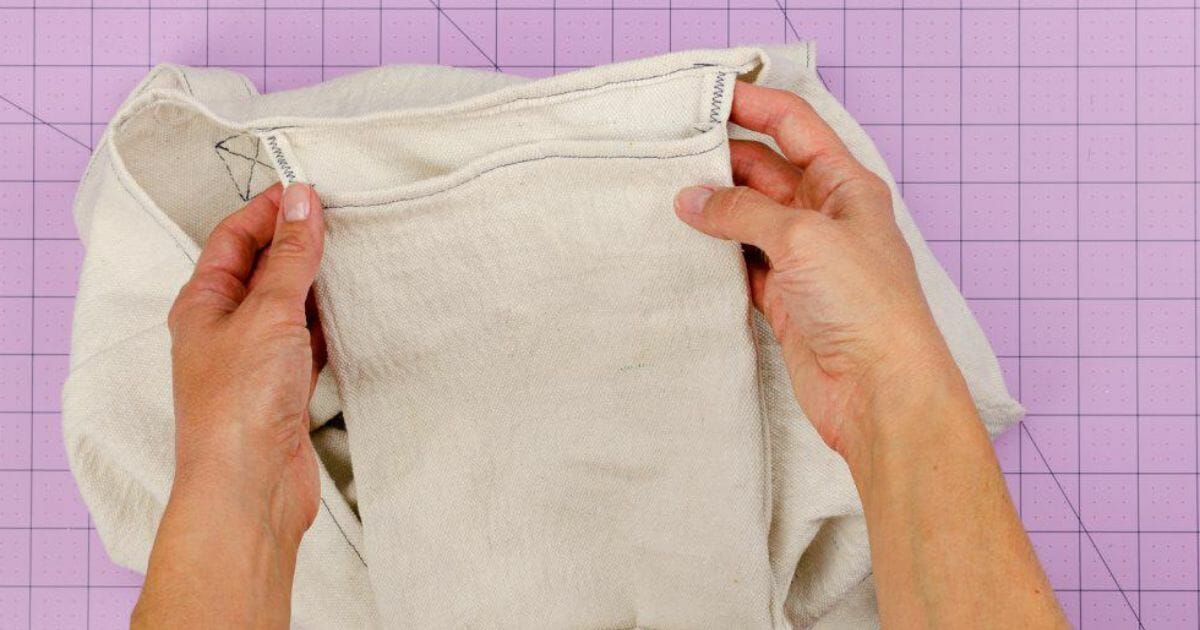
Step 5: Taking care of the finishing stitches
- The last piece of the puzzle involves flattening out the bottom of the bag. To do so, place the bottom seam line against the side seam to make it look like a triangle.
- Now make a line across it using a marking chalk or a pencil.
- Sew on the marked line and then remove the extra fabric.
- Repeat the same process with the lowermost corner of the bag and then turn the side.
- Slip-stitch the opening to close the bottom and then squeeze it into the finished tote.
Add an Interior Slip Pocket to Your Tote Bag
While it’s true that a tote bag looks chic, having an exotic interior slip pocket in tote bags is equally trendy. This is easy to do with a tote bag with pockets pattern.
Keeping the trend aside, stitching an interior pocket to your simple tote with exterior pockets offers many other benefits. So, if you plan to add an internal slip pocket to your tote bag, simply follow the instructions mentioned below.
- Before you begin with the cutting or the stitching, consider how big you would like the interior pocket to be. Think about the finished size of your tote bag and if there’s room on all sides of the pocket that won’t interfere with stitching.
You can choose how big or small you want the interior pocket to be. It’s probably best to stick to a 6-inch by 7-inch standard-sized pocket. Regardless of the pocket size you choose, remember to add half an inch to all sides for seam allowances. After you have finalized the size, don’t forget to select the fabric and the pocket print.
- Match the right side of the pocket pieces together and sew them around on four sides, leaving a 2-inch opening at the bottom. Backstitch the beginning and the end of the corners.
- Before flipping the sides, press the opening seam under by around a quarter inch to make it easier to close. Now poke out the corners with a pencil.
- Now choose the placement for the inside pocket. An excellent place to consider is 3 inches down from the top edge of the lining. Alternatively, you can measure how far down the external pockets are to get an idea of how deep the interior pocket can go.
- While deciding, consider whether you want the interior pocket in the center or side.
- Next, place the pocket piece in its chosen position and pin it up. Remember to keep the open side of the pocket facing down towards the bottom of the tote.
- After securing the location and placement, topstitch the pocket on both sides and the bottom of the pocket to secure it to the lining.
- Pull out the threads through the wrong side of the lining and tie them off to give a clear and neat finish.
In Conclusion
Pockets are indeed an essential part of almost any bag, even totes. After all, their functionality and ease of use depend upon how well thought out the pockets are.
Don’t hesitate to start designing a tote for your next DIY project. Remember that a tote bag with pockets pattern looks stylish and passes the functionality test.